I spent four hours editing a Reel for a client — transitions, color grading, music synced perfectly. Uploaded it and the quality looked like it was filmed on a Nokia from 2006. The original file was 1080p. Instagram had compressed it to mud.
Blurry Instagram Reels on Android is one of those problems that makes you question your entire content workflow. You filmed in 4K. You edited carefully. You exported correctly. And then Instagram takes all of that and serves it back at what looks like 360p on a bad connection.
The frustrating thing is that it’s not always the same cause. Sometimes it’s Instagram’s data saving mode silently throttling video quality. Sometimes it’s the export settings from your editing app. Sometimes it’s a network issue at the moment of upload. And sometimes it’s just Instagram being Instagram — taking a few hours to process and upgrade the video quality after upload.
I’ve dealt with this across Samsung, Xiaomi, and OnePlus phones, and across different editing apps. Here’s every cause and every fix, in order of how common they are.
Why Instagram Reels Look Blurry on Android
Before anything else — wait. Instagram takes up to 24 hours to finish processing the full HD version of a Reel after upload. If you uploaded an hour ago and it looks blurry, it might just be processing. Come back the next morning and check again before trying any fixes.
The Fixes — Most Common First
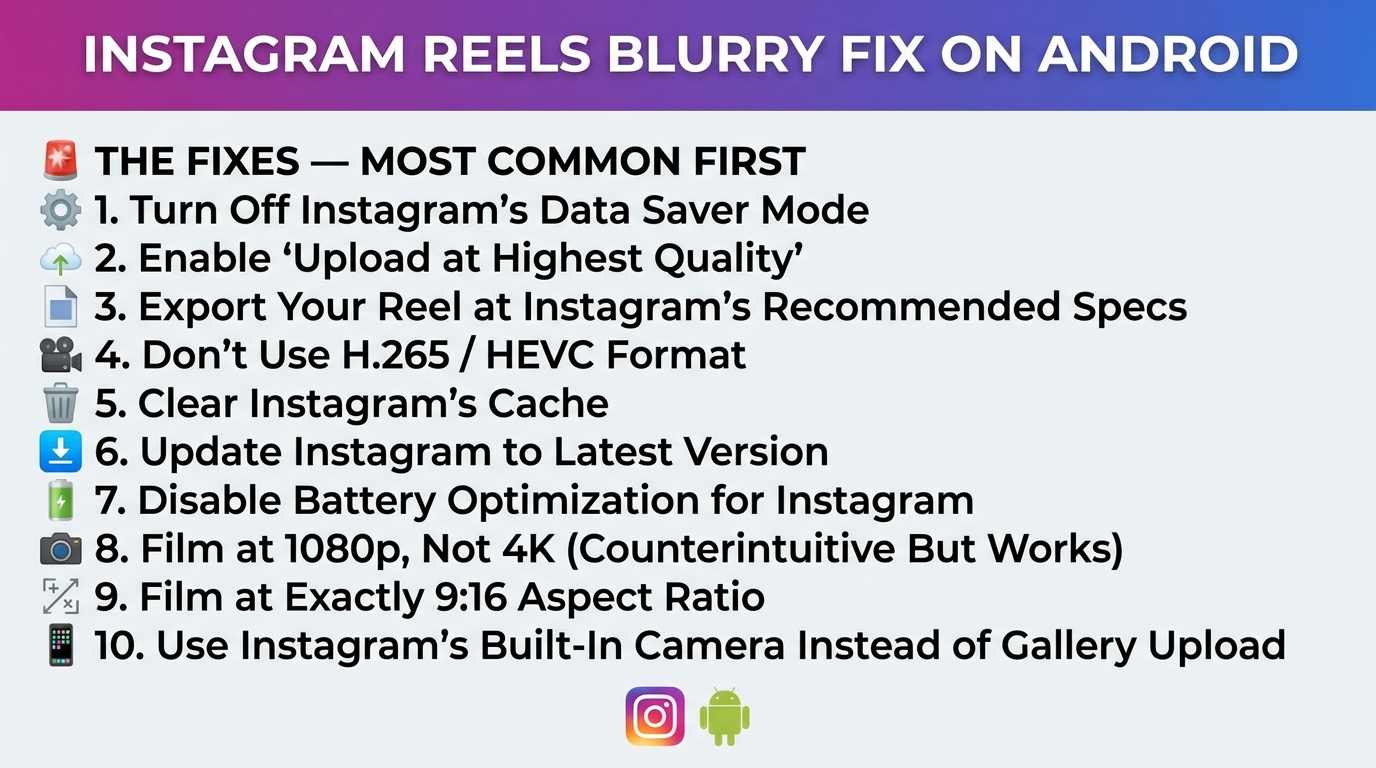
This is the most common cause of blurry Reels — and the easiest fix. Instagram has a built-in Data Saver that reduces video quality to lower mobile data usage. It’s sometimes enabled by default, especially after an app update. When active, Reels play at the lowest possible quality regardless of the original file quality.
- Open Instagram → tap your profile icon (bottom right)
- Tap the three lines (hamburger menu) → Settings and Privacy
- Scroll down to “Data usage and media quality”
- Make sure “Data Saver” is toggled OFF
- Also check “High quality uploads” — toggle it ON
- Restart Instagram and check your Reel quality
Instagram has a separate setting specifically for upload quality that many people have never touched. Without it enabled, Instagram compresses your video during upload regardless of the source quality.
- Instagram → Profile → Menu → Settings and Privacy
- Tap “Media quality” or “Video quality”
- Enable “Upload at highest quality”
- For future uploads: always upload over WiFi — Instagram serves higher quality to WiFi uploads
- If you uploaded over mobile data: delete the Reel, reconnect to WiFi, and re-upload
“Instagram doesn’t show you full quality by default — you have to explicitly tell it to. That one toggle in settings fixes blurry Reels for most people in under a minute.”
When Instagram receives a video that doesn’t match its preferred format, it re-encodes it — and that re-encoding always reduces quality. Exporting at the exact right specs means Instagram can use your file directly with minimal processing.
- Resolution: 1080 x 1920 pixels (vertical 9:16)
- Frame rate: 30fps (60fps is accepted but 30fps processes more reliably)
- Video codec: H.264 (NOT H.265/HEVC — Instagram re-encodes HEVC files heavily)
- Audio codec: AAC at 128kbps minimum
- Bitrate: 3,500 kbps or higher for 1080p
- File format: MP4
- In CapCut: export at 1080p, H.264, 30fps
- In Adobe Premiere: use “Match Source” then change codec to H.264
Many Android cameras now default to HEVC (H.265) recording because it’s more efficient. Some editing apps also export in HEVC by default. The problem: Instagram doesn’t natively support HEVC and has to re-encode it to H.264 during upload — this re-encoding introduces visible quality loss that wasn’t in your original file.
- Check your camera settings: Camera → Settings → Video quality — look for “HEVC” or “H.265” and switch to H.264 if available
- Samsung: Camera → Settings → Advanced recording options → turn OFF “High efficiency video”
- In CapCut export settings: change codec from HEVC to H.264
- If your source clips are already HEVC: convert them to H.264 using HandBrake (free) before editing
Instagram caches video quality levels — if you watched a Reel on a slow connection once, it might keep serving the cached low-quality version even when you’re on fast WiFi now. Clearing the cache forces it to re-fetch at current quality.
- Go to Settings → Apps → Instagram → Storage
- Tap “Clear Cache” — do NOT tap “Clear Data” (that logs you out)
- Reopen Instagram, go to your Reel and replay it
- The quality should now reflect your current connection speed
Instagram’s Android app has had multiple known video quality bugs that were fixed in subsequent updates. If you’re on an older version, you might be hitting a known issue that was already patched.
- Open Google Play Store → search Instagram → Update if available
- If you just updated and quality got worse: this is a known pattern — Instagram occasionally releases updates with quality regressions
- Check the r/Instagram subreddit to see if others on your phone model report the same issue after the same update
- If confirmed bug: the fix is waiting for the next patch (usually 1–2 weeks)
On aggressive battery management phones, Instagram’s video processing is sometimes throttled mid-upload — resulting in an incomplete or lower-quality upload that Instagram then serves at reduced quality. This is more common on Samsung and Xiaomi devices.
- Go to Settings → Apps → Instagram → Battery
- Set to “Unrestricted”
- Samsung: Settings → Battery → Background usage limits → check Instagram isn’t restricted
- Delete your existing Reel, re-upload with the phone plugged in and battery optimization disabled
This surprises most people. Instagram can’t serve 4K Reels — its maximum output is 1080p. When you upload a 4K file, Instagram re-encodes it down to 1080p during upload processing. That downscaling introduces compression artifacts that often look worse than a native 1080p source. Filming at 1080p and uploading 1080p gives Instagram nothing to downscale — and the result is typically sharper.
- Set your camera to 1080p 30fps (not 4K) specifically for content meant for Instagram
- This also reduces file size, making uploads faster and more reliable
- If you want to keep filming in 4K for future-proofing: export your edit at 1080p H.264 before uploading to Instagram
If your video isn’t already 9:16 (vertical), Instagram crops and re-encodes it during processing. Every re-encoding step degrades quality. Filming vertically from the start — or exporting at 1080×1920 before uploading — prevents this extra processing step entirely.
- Switch your phone to vertical before filming — obvious but often skipped
- In editing apps: set your canvas to 1080 × 1920 (9:16) at the project start, not after editing
- If you have a horizontal source clip: scale it to fill the vertical frame in your editor before export — don’t let Instagram do the cropping
For very short Reels (under 30 seconds), filming directly in Instagram’s camera sometimes produces noticeably better quality than uploading a file. Instagram processes native-app footage with less aggressive compression. Not practical for edited content, but worth knowing for quick talking-head clips.
- Open Instagram → Reels tab → camera icon
- Film directly in the Instagram camera at the highest available quality setting
- For edited content: this doesn’t help — stick to the export settings in Fix 03
Quick Reference — Symptom to Fix
| Your Situation | Best Fix to Try |
|---|---|
| All Reels look blurry — mine and others’ | Fix 1 (Data Saver off) — this is almost always the cause |
| Only my uploaded Reels look blurry | Fix 2 (high quality upload on) + Fix 3 (export specs) |
| Blurry right after upload, clear the next day | Normal — wait 24hrs for Instagram to finish HD processing |
| Uploaded on mobile data, looks blurry | Delete + re-upload on WiFi with Fix 2 enabled |
| Samsung / Xiaomi — blurry only on this phone | Fix 7 (battery optimization) + Fix 5 (clear cache) |
| Started after latest Instagram update | Fix 6 (check for newer update) — known bug pattern |
| Edited video looks great in CapCut, blurry on Instagram | Fix 3 (H.264, 1080p) + Fix 4 (not HEVC) in export settings |
| 4K footage uploaded, looks worse than expected | Fix 8 — export at 1080p before uploading, not 4K |
Mistakes That Keep Reels Blurry
Instagram’s high quality upload setting doesn’t apply equally to WiFi and mobile data — even with it enabled, uploads over cellular data are still more compressed than WiFi uploads. The algorithm assumes you want to save your data. If you uploaded a Reel that looks blurry, the first question is always: was I on WiFi? If not, delete it and re-upload on WiFi.
“Highest quality” in your editing app doesn’t mean Instagram-compatible quality. Many apps export at maximum quality using HEVC/H.265, which Instagram re-encodes. A 1080p H.264 export at “medium” quality in your editing app will often look better on Instagram than a 4K H.265 export at “maximum” quality — because Instagram can use the H.264 file more directly.
The most common time-wasting move is deleting and re-uploading the same file multiple times without changing anything. The same blurry video will produce the same blurry result. Identify which cause applies to your situation first — fix the source, then re-upload once.
If your Reel looks fine but text overlays or on-screen graphics look specifically blurry — this is usually a different issue from general video blur. Text in videos needs to be at a minimum font size of about 40–50px in a 1080p frame to survive Instagram’s compression. Very small text gets anti-aliased into blurriness. Use bold fonts, larger sizes, and avoid very thin or light-weight typefaces in Reels.
What Fixed the Client’s Reel
Going back to that situation from the beginning — the four-hour edited Reel that uploaded looking terrible. The problem turned out to be two things stacked: the export from CapCut was in HEVC (Fix 4 issue) and the upload happened over mobile data (Fix 2 issue). Both independently would have caused quality loss; together they made it look genuinely bad.
The fix: re-exported from CapCut with H.264 selected explicitly (it wasn’t the default), connected to WiFi, confirmed the high quality upload toggle was on, and deleted the old Reel before uploading fresh.
The re-uploaded version looked exactly like the CapCut preview — sharp, vibrant, no compression visible. The same content, same phone, same internet connection. Just two settings changed.
Before every Reel upload: Data Saver OFF ✓ → High quality upload ON ✓ → Connected to WiFi ✓ → Exported as H.264 (not HEVC) ✓ → 1080p vertical (not 4K) ✓ → Aspect ratio 9:16 ✓. Five checks, takes 30 seconds. Doing this before uploading prevents needing to delete and re-upload after noticing the quality problem.
Start with Fix 1 (Data Saver off) and Fix 2 (high quality upload on) — these two settings fix blurry Reels for the majority of people in under two minutes. If you’re uploading edited content, make sure you’re exporting as H.264 at 1080p — not HEVC, not 4K. Always upload on WiFi, not mobile data. And if a freshly uploaded Reel looks blurry, wait 24 hours before doing anything — Instagram’s HD processing takes time and the full-quality version often appears on its own without any intervention.